Tutorial - Smokey Brown Eye with Constructivist Paint Pot as a Base
This tutorial is designed to show you how to create a light smokey brown eye that’s perfect for both night and day with very detailed photos and text directions to guide you.
Skill Level: Beginner
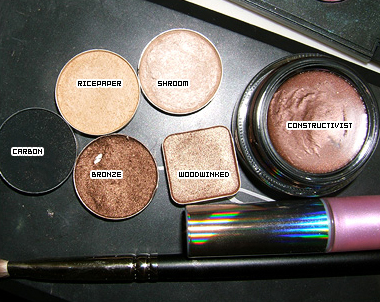
Eyes: Constructivist paint pot (Warm dark brown cream shadow/base), Shroom eyeshadow (light taupe), Woodwinked eyeshadow (warm bronzy brown), Bronze eyeshadow (dark shimmery brown), Carbon eyeshadow (matte black), Ricepaper eyeshadow (neutral highlighter), Indianwood paint pot (bronze gold cream eyeshadow), Graphblack technakohl (black kohl liner), and black mascara.
Face: If you’d like to compliment the eyes, use Margin blush (darker coral) on apples of cheeks with Taupe blush to contour.
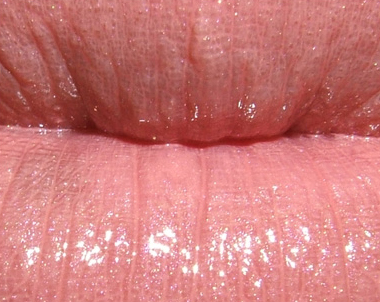
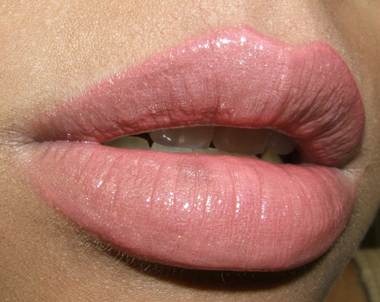
Lips: For matching lips, try Curtsy lipstick with Lightswitch 3D lipglass.
Tools: MAC 249 firm shadow brush, 239 shadow brush, 219 detailed crease brush
Here are the products you will need.
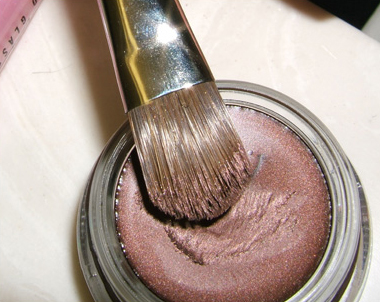
Using the MAC 249 firm, flat shadow brush, pick up a small amount of Constructivist paint pot – the amount of product shown on the brush is all you need for each eye.
Applying the product you picked up with the 249, begin applying the color on the inner portion of your lid.
Cover your entire lid and just above your crease with Constructivist paint pot, as shown here.
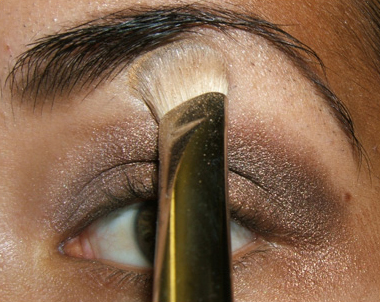
Smooth out uneven edges with the horizontal edge of the 249 by sweeping it back and forth within the crease.
Use side-to-side, sweeping motions, working solely within the crease to help blend it and soften the harshness of the edge.
Once softened, this is how it appears.
Using MAC’s 239 small fluffy shadow brush, pick up a generous amount of Shroom eyeshadow and apply to the inner third of the lid.
It will turn the brown base to a taupe-gray color, as shown.
Continue to use the 239 and pick up a bit of Woodwinked eyeshadow to apply to the middle third of the lid. Start just below the crease, holding the brush firm and flat against your lid and bring it downwards.
The color will be applied evenly if you make a fluid downstroke.
Even out the color by repeating the previous two steps just a bit further, closer to your outer lid.
Again, with the 239 pick up Bronze eyeshadow and begin applying it in your outer crease, with the same method as before, where you start there and pull the brush downwards.
Stroking downwards with the 239, the Bronze eyeshadow will deposit evenly across the outer third of your lid.
Begin blending and evening out the Bronze eyeshadow by brushing across and towards the outer portion of your lid with the 239 brush.
With the 239, pick up a very small amount of Carbon eyeshadow and move your brush to the middle of your crease and sweep outwards.
By sweeping outwards you will deposit the black shadow in the portion you want.
It should be a very obvious black line, almost, because it has not been blended, only applied.
Using the same method as used to apply the black shadow, use this method, only with less pressure, to sweep back and forth across the area with the black shadow to help blend it into the other lid colors.
When meshed with the other colors, the black becomes a smokey brown color and less drasti and harsh.
With the 239, pick up a generous amount of Ricepaper eyeshadow and begin applying it beneath the inner portion of your eyebrow.
Use a sweeping motion towards the outer edge of your eyebrow as pictured.
Continue to apply (and pick up more shadow if necessary) the highlight color directly below the first sweep of color and above the crease to help mesh the colors together.
As before, sweep the brush and move towards the outer edge of the eye.
This is what you should find yourself seeing.
To keep the crease looking dark and dramatic, but with more brown undertones, add a touch of Bronze eyeshadow with the 239 into the crease.
Bring the brush outwards to cover the entire length of the outer crease.
The darker gray has not become a deeper brown with slight gray hues.
With the 249 brush, pick up a very small amount of Indianwood paint pot to line the lower waterline.
Using the 219 brush, pick up Bronze eyeshadow to line the outer third of your lower lash line.
Your lash line should look something like this.
Apply Graphblack technakohl or your choice in black eyeliner to the lower lash line, keeping clear of the water line.
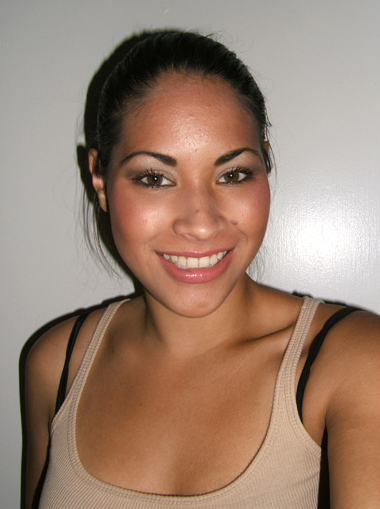
Your fnished product will be a subtle brown smokey eye that can be worn throughout the day or even at night as a dramatic look.






Gorgeous!! I’m a sucker for brown hues for the eyes and this is another great look. I’m definitely adding constructivist in my Paint Pot collection 🙂
Thanks, Janis! I’ve actually NEVER done a brown smokey eye… can’t think of why I wouldn’t after having done it!
awesome!! you are just amazing! love the pictures, love the tutorials, love it, love it, love it, keep it coming!
Thanks, Samantha! I’ll do my best!
you are SOOOOO SOOO talented!
Thanks, Ignacia!
I’m so jealous, I wish I was as good with makeup and colors as you are!
Just keep practicing, Ignacia – that’s the secret, really! It’s all I keep doing to get better 🙂
so pretty!
Thank you, Janina! 🙂
Hi Christine,
This look looks fabulous on you!
I’m always scared to do smokey browns/taupes because for some reason I find this combo to be very easy to get muddy looking – is it because I’m overblending one color into the next? Thanks!
Hey Meme! Thank you!
Really? It might be because you are overblending, or perhaps you need to use more drastically different shades of brown.
For some reason I CANNOT blend eyeshadow in my crease, outer V, or anywhere near the edge of my eye. There is always a harsh line no matter what (I actually had to stop wearing eyeshadow for a few days, because my whole crease and outer corner of my eye turned red from trying to blend). Could that be because I’m using cheap brushes? I tried blending in different ways, too but nothing works! I don’t get it…
It has nothing to do with the expense of the brushes, however, are you using the right kind? You want a fairly fluffy brush, something that moves easily. Also, you aren’t trying to rub it into your skin, so you might want to try using a lighter hand and just sweeping across your lid to blend.
I’ve just discovered your site through a random blurb about a smokey eye tutorial and I have to say you’re amazing! The photos and step-by-step instructions are totally awesome. I’ve always felt rather inept when it comes to applying make-up but after reading a couple of your tutorials I think I might be able to pull it off. Looks like I have some make-up to buy soon 🙂
Thank you, Octy! 😀 Smokey eyes are quite feasible once you get the hang of it. Good luck! I hope it works out for you!
this is a very pretty look!! I really love and appreciate you site. i am a make-up addict and like you, I LOVE MAC!! i use alot of other products but MAC is my #1 choice. i’ve recentlly ran into you web site about 3 months ago and am hooked. THANK YOU!! i love experimenting with make-up and trying different looks. i will definitely use many of your looks.
Hey Erika! Thank you so much 🙂 I’m with you – MAC is my #1! Happy to hear you’re experimenting – isn’t it fun?
I am so glad I came across your website. It is exactly what I was looking for. You are so talented and this site is so so so helpful! 🙂
Yay! I’m happy I could help, Jennifer 🙂 Thank you!
Where Can I buy these makeups? Like the paint pots and the lipglosses etc?? HELP PLS!!!
Hey Taisha! You can buy them at http://www.maccosmetics.com or at any MAC counter or local store in your area. Use the site link I gave you to locate the nearest store!
I tried this look and I got a lot of compliments 🙂 Thanks so much! I love how Woodwinked e/s popped out with Constructivist paint pot…couldn’t stop staring at my eyes 🙂
Oh, yay! I’m so glad the look turned out awesome for you 🙂
Hi Christine!
I’m from Singapore (in Asia, FYI 😉 & i was directed to your site by one of my good friends.. All i can say is WOW, you are absolutely talented, girl!
Thank you so very much for all the detailed tutorials, pictures (which i’m sure were very hard to take considering all the positions your brushes were in!) and most of all, the sincerity with which you teach all of us out there..
Once again, thank you so much, you have yet another loyal fan (:
By the way, may i make a small request? I am a student, with a tiny (x 123432434) budget, and i’d like to know which eyeshadows, pigments, brushes, liners etc etc, i should invest in, to get as many looks as possible? FYI, i am a tanned indian asian, kinda olive with yellow undertones. I wear Mac Studio fix in NC40. (:
Once again, thank you very much for all your time & effort!
xoxo
Aarti
Hi Aarti! Thank you so much for the compliments 🙂
Skip brushes until your budget is bigger – find craft store brushes or drugstore brand brushes for now. I know you’re in Singapore, but Sonia Kashuk, which is carried in the States at Target, makes decent brushes and they’re not so high priced. Better yet, wait for some MAC brushes and pick up a holiday set – you get 5 brushes for $48, which isn’t a bad deal for MAC brushes.
Eyeshadows… it depends on what kind of colors you like best. I would probably pick up one light shade and one dark shade in whatever color families you like. For instance, green – Juxt for light and Humid for dark.
Pigments you can skip until you can afford them, unless you can buy samples – full jars of pigments are pricey and no consumer will go through it very quickly (if you used it everyday all over your face/body, perhaps you’d go through it, otherwise, doubtful!).
I’d get a black and brown liner, but you can buy them from the drugstore before MAC – I like MAC liners, but they’re not SO great that you have to have them now.
hey christine. this may sound like a stupid question but when i finish applying eyemakeup (this smokey look for example), and then i put on foundation (perhaps not enough), the colour in my outer crease looks so obvious and it doesn’t go well with my skin colour. im a NC42. in your overall look, you cant see the hardlines in your outer crease and it flows with your foundation, how do i do that? do i just blend it in? with a 217?
desperately in need for your help!!
thank you
Hey Fiona! You probably just need to soften the line between color makeup and skintone – easily done by using a buffer brush like the 182 in that area. I put on foundation after color as well, and I’ve never had to pay special attention to it. Sometimes just sliding your finger across the harsh line can soften it, too.
this website is soooo great. I’m one of those girls who has just gone natural (NO makeup), and I wanna try this. These tutorials are great…i look forward to coming to this website making my shopping list for MAC and going shopping!
Thanks, Nikki! I hope this tutorial works out for you 😀
hi christine
wow this look is amazing i am deffinatly going to try it, i was just wondering if this look would suit pale to medium skin tone?
thanks 🙂
Hey! I think this would definitely work on your skintone 😀
Hi I am very very pale and I have blue-grey(and a little bit of green) eyes: would the constructivist shade make my blue eyes bluer or do I need to try something else?
Hi Emma,
I think this would bring out the blue in your eyes!
This is definitely my favorite look on you. Very gorgeous and subtle! Love it.
I’m going to have to add to my collection. Thankfully I’m not in the hole with all the shopping I’ve been doing.
… Yet. 😉
Thank you, Sarah! Good to know that this look was a goody 😉
Hi Christine,
I’ve checked out your site a couple of times and I think your tutorials are great!! I really love the brown/neutral looks (especially this smoky look) but I’ve been wanting to try something different. I wanted to know if you could do a tutorial (or maybe you have one already) using Stars N’ Rockets eyeshadow. I have a medium tan/olive skintone and I’m always afraid to use such a bold color but I love the color! Any suggestions?
Hi Suzie! Thanks so much!
I believe I have done some looks/tutorials using Stars ‘N Rockets – just do a search for the color 🙂
I adore it with pinks!
I live all the way in South Africa and you have no idea how addicted I am to these tutorials! you are stunning girl! keep it up!
Thank you so much, Stormy!
i love your eye makeup it looks amazing!
Thank you, Kelly!
Christine this look is amazing!!! I actually have all of the colours you used except for the paint pot!!! Do you think that another base (I have Indianwood paint pot) would work??
Thanks so much, Andrea! I think Indianwood would be OK!
it is wounderful
Thanks, Doaa!
You look stunning Christine!
How do you think this would look paired with Chanel Dragon lip lacquer?
It’d be a bit dramatic – which is fine – but I’d probably lighten up the eye just a tad!
Thanks, Tina!
Hey!!
so i know this is a super old post, but i was trying to search online for whether paint pots are waterline safe. this is the ONLY post i’ve found via google that has used a paintpot on the waterline. so i’m assuming they are?
please let me know 🙂
very much addicted to your page btw 🙂
<3
I am not sure 🙁
what kind of camera do you use?
I don’t remember – this is a really old post, so I’m not sure what camera I used at the time.
can i hire you? i tremble and when i use make-up i look like a panda 🙁 haha not cool though