Tutorial - Colorful Green Eyes Featuring Make Up For Ever


Tutorial: Colorful Green Eyes
Here’s a tutorial for this look! 🙂 This is actually a pretty simple and straight-forward look. You’re really only using four colors, including highlighter!
You will need the following…
- Eyes: MAC Soft Ochre paint pot (neutral base), Make Up For Ever #171 Eyeshadow (shimmery chartreuse), Make Up For Ever #91 Eyeshadow (matte bright medium green), Make Up For Ever #53 Eyeshadow (shimmery forest green), Make Up For Ever #101 Eyeshadow (sheer, yellow-gold shimmer), Make Up For Ever Aqua Eyes 12L (deep teal-green), Make Up For Ever Aqua Smoky Lash Mascara (black)
- Cheeks: Make Up For Ever #5 Blush (matte coral-orange), Make Up For Ever #153 Blush (shimmery peachy-gold)
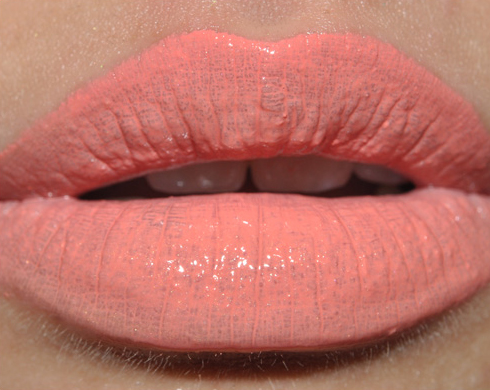
- Lips: YSL Peach Passion Rouge Volupte Lipstick (peachy-coral), MAC Liberated lipglass (pale gold-yellow)
- Brushes: 266 (firm, angled brush), 226 (fluffy crease brush), 219 (pointed crease brush), 214 (smudge brush), 249 (flat, firm brush), 239 (fluffy shadow brush), 116 (dense blush brush), 165 (highlighting brush)
Directions: Define brows using a coordinating powder shadow applied with the 266 brush. Apply MAC Soft Ochre paint pot all over the lid as the base with the 249. On the inner lid, pack #171 eyeshadow on using the 239. On the outer lid and crease, apply #91 eyeshadow with the 226. Increase intensity by packing on more of #75 eyeshadow with the 239. Darken crease with #53 eyeshadow using the 219, and then blend out with the 226. Sweep #101 eyeshadow underneath the brow bone to highlight with the 217. Smudge lower lash line with #171 eyeshadow with the 214 brush, pressing into lower lashes. Finish with 12L Aqua Eyes on on the lower lash line using the 208. Apply Aqua Smoky Lash mascara on lashes. Sweep apples of cheeks with #5 Blush using the 129, then highlight with #153 with the 165. Apply YSL Peach Passion Rouge Volupte lipstick to lips, and then top with MAC Liberated lipglass for color and shine.
Now, get the dish on how-to do this look!
1. Begin with a clean/makeup-free eye area. Make sure any moisturizer you’ve applied has been fully absorbed, otherwise it might reduce the effectiveness of your eyeshadow base/primer.

2. Apply a neutral eyeshadow base like MAC Soft Ochre paint pot with a flat, firm bristled brush like the 249. You can also use products like Urban Decay Primer Potion or Too Faced Shadow Insurance.
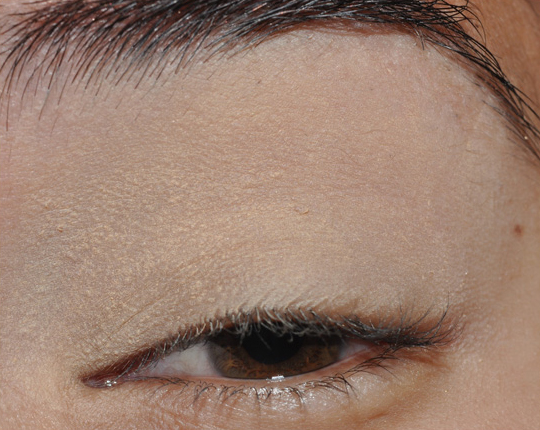
3. You’ll want your eyeshadow base to cover your eye area from lash line to brow bone.
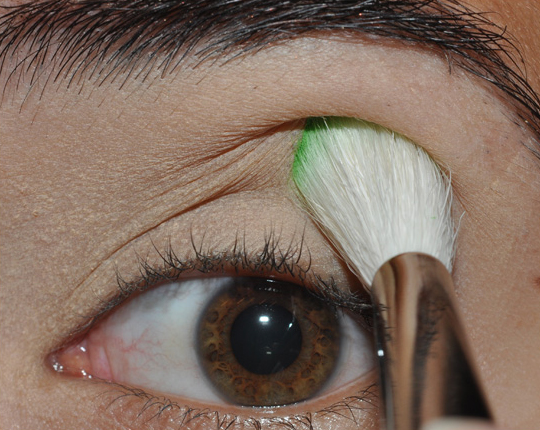
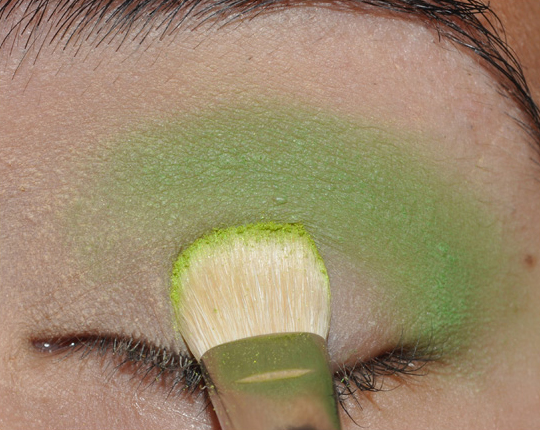
4. With a fluffy crease brush like the 222, apply Make Up For Ever #91 eyeshadow, which is a bright candy apple green, to the outer half of the crease.
5. Swish the brush back and forth like a windshield wiper.
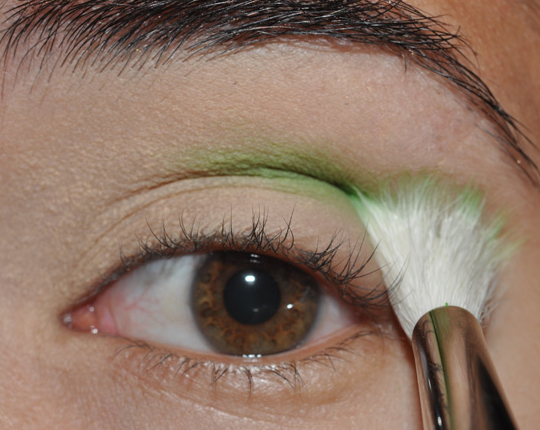
6. This is how the color should look like once it has been deposited and blended. You may need to go back and add more eyeshadow to get the level of intensity you desire.
7. With an eyeshadow brush like the 239, apply Make Up For Ever #171 eyeshadow, which is a chartreuse shimmer shade, all over the lower lid.
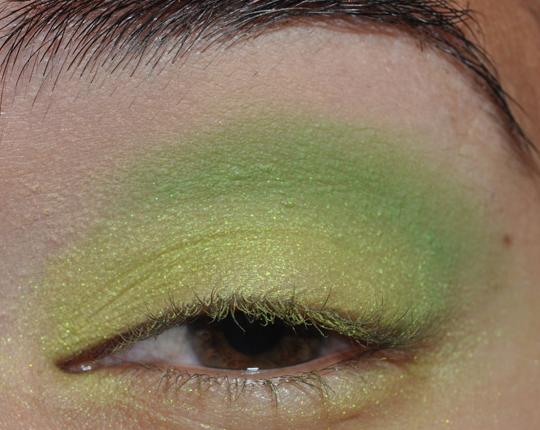
8. This is how it should look. Layer additional eyeshadow over it to even out the color or intensify it as necessary/desired.
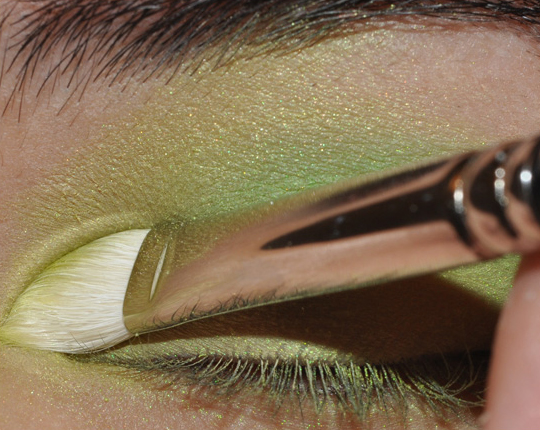
9. Using a slightly angled fluffy brush like the 272, apply Make Up For Ever #171 eyeshadow to the inner tearduct and move the brush upwards.
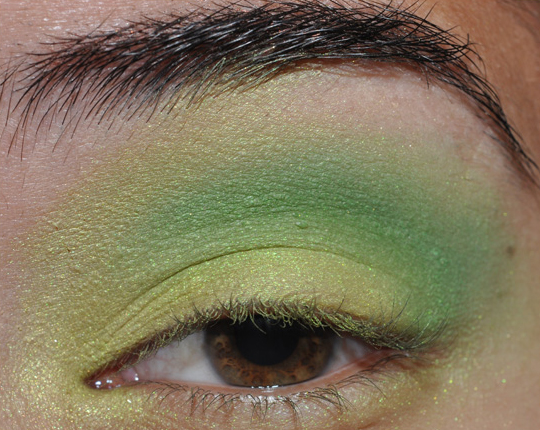
10. This is how it should look now.
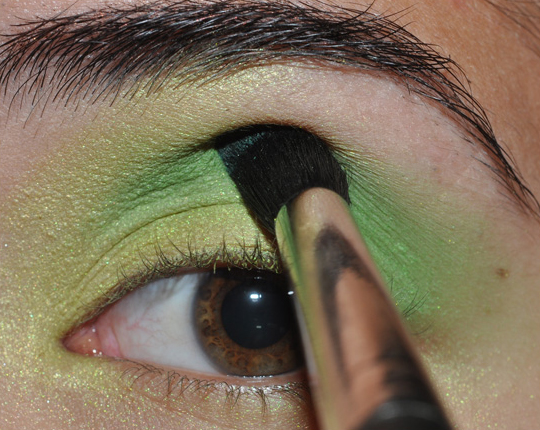
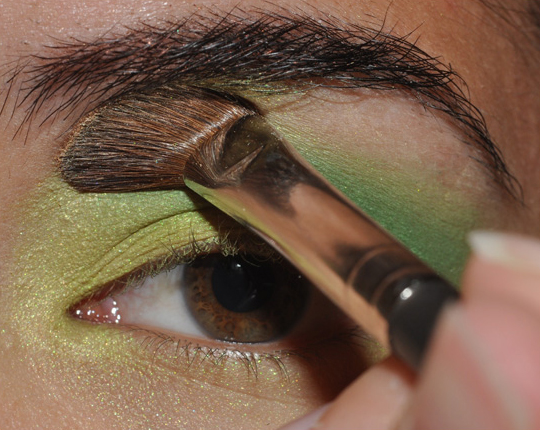
11. With a lightly pointed crease brush like the 226, apply Make Up For Ever #53 eyeshadow, a forest green, into the crease to darken. Make sure you’re not overlaying it over all of the candy apple green. You just want to get it on the upper half of that color layer.
12. Pull the brush outwards to blend out the color into the crease.
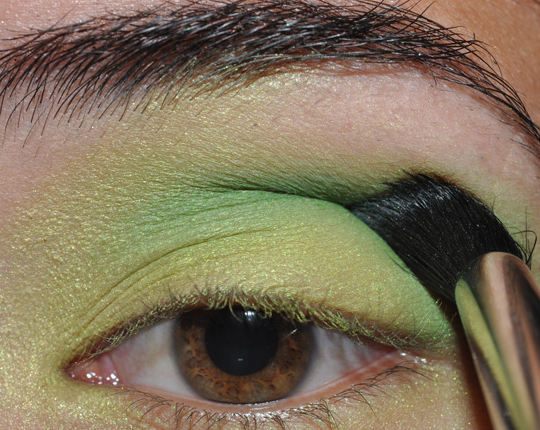
13. This is how it looks after you’ve added more depth to the crease.
14. With a large fluffy brush like the 275, apply your choice in highlighter (I chose Make Up For Ever #101, which is a soft gold shimmer) to your brow bone. Start on the inside and work your way outward. Add a green-teal eyeliner like Make Up For Ever 12L to the lower lash line and black mascara to finish the eye look. For blush, try matching with corals, like Make Up For Ever #5 Blush and Make Up For Ever #153 Blush. For lips, try a coral shade as well. I used YSL Peach Passion Lipstick and MAC Liberated lipglass.
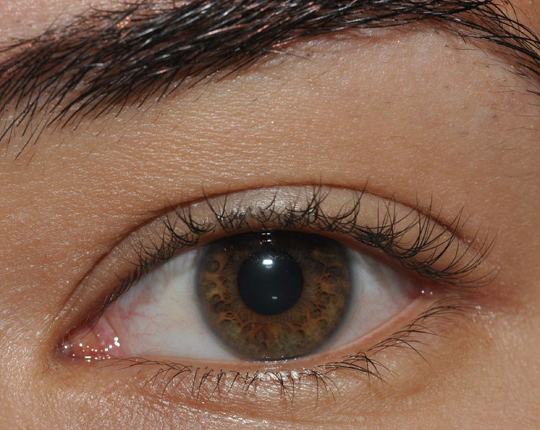
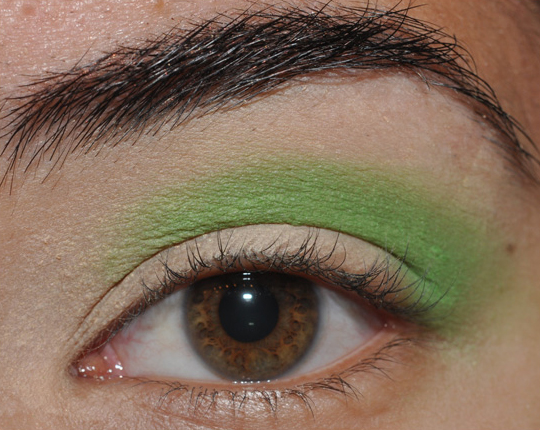
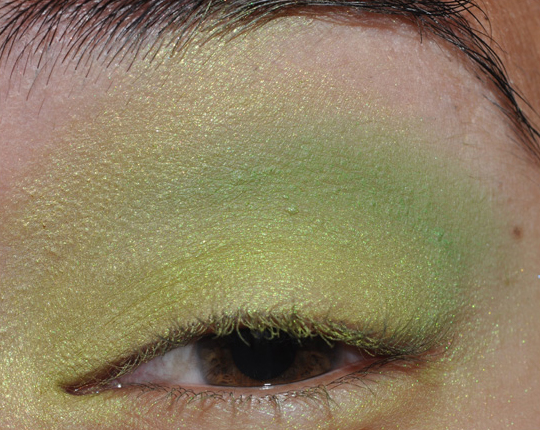
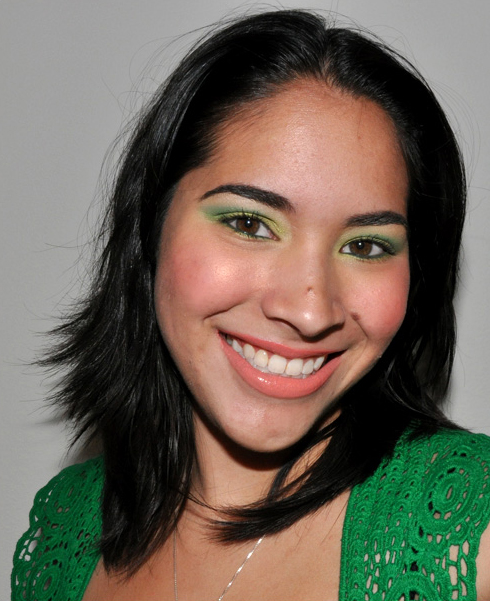
Here’s the finished product…


Absolutely stunning! I love these greens.
Thanks so much, Jenn!
These greens are insane.. so gorgeous.. I’ve always liked MUFE eyeshadows for the color payoff! How do you like the blushes? I’ve never tried them..
Greens are always so pretty to work with!
Actually, MUFE blushes ARE just MUFE eyeshadows!! They’re exactly the same. If you go to Sephora, they’re pretty much just *marketing* certain shades as blush colors, but they’re the same size, price, etc. as eyeshadows – there’s literally no distinction between the two!
I love greens!! This look is beautiful!!
Thank you, Heather!
thanks for your wonderful tutorial.
now start to love MUFE eyeshadow
Thanks, Hoonie! 😀
Superb! Thanks for the tutorial, Christine.
Thanks, Pia 😀
this is beautiful CHristine! U HAVE TO TELL ME HOW what to do to not get those lines under my eyes 🙁 Is it that you are super gentle or what? Cuz you have like NONE! 🙂
Thanks, Charlene! OMG, what?! I have those terrible, terrible tiny fine lines. I am only 22, and I can see them 🙁 It seems too early!
i saw what seemed like two new ones today….so depressing, i’m 24! 🙁 i hate it …altho i have seen other young ppl with worse! I am going to try Envision BEauty’s THe SOlution…and see if it helps. u cud check it out!
I do have that, actually, I just haven’t tried it yet! I’m using Kate Somerville at the moment.
I feel your pain. Using non-sensitive skin products for my Sahara Desert face when I was 10 gave me those, so I can see them and I’m only 15 🙁
girl…:( dang…now that is serious…I even try sleeping on my back now because they say sleeping on your side and scrunching your face causes wrinkles too lol
LOL! Aww 🙁
So pretty! I really like the MUFE green #91.
Thanks, Linda 🙂
Christine! I’m sure the answer is because you dont have time but, i would LOVE to see these looks in the form of a tutorial on your youtube account. I love your color placement and these color combos!! You make me wanna run out and grab some MUFE!
I’d like to do more YouTube tutorials, but you’re right, time is a major constraint right now :/
Hi Christine! Wonderful tut. I was just wondering if you could still achieve the entire look with just the MAC 239? Would it look the same?
Thanks, Faiza! Yes, I definitely think you could 🙂
really pretty!! 🙂
Thanks, Shen! 😀
Greens look so good on you, Christine! I like that you’ve used the step-by-step pics again, although it’s a bit confusing to me because of the different order (first crease in pics vs. first inner tearduct in explanation). Anyway, I could never pull off greens like you do!
Thanks, Roxanne 🙂 When I do more matte looks, I tend to do the crease first!
this is like poison ivy makeup! very pretty!
LOL! Thanks, Sera!
YAYYYY! I LOVE your tutorials! Really, I do! This is a great one Christine!! I replicated this look a few days ago for my mom’s b-day (she loves tinkerbell, and green, so I thought it was fitting!) and did it totally different! Now I have to try it this way too!! 😀
Thank you, Mariah!! 🙂 How did the look turn out for you when you did it?
I tried this look using some Ben Nye, Coastal Scents and Nars today. I love how you break down the colors for use describing them and the brushes you use, so thanks for all the details.
YAY! I am glad you were able to try out this look, Rosie! How did it go?
I definitely think it’s important to talk about the colors themselves, just because there’s a pretty high chance that someone doesn’t have what I used, and I don’t think it’s necessary to rush out and buy exactly what I used to achieve the look. Substituting is SO possible 😀
My coworkers loved the look :).
Yayy!! That’s so great, Rosie!
Thank you for making such a detailed tutorial! I appreciate the step by step photos, and brush recommendations 🙂
Thank you, Lana! I hope you’ll give it a try 😀
this looks like kandee the make-up artist’s take on her tinkerbell halloween makeup ….
Sorry, I don’t know who you’re referring to, but this is original work!
Wonderful, just what I was looking for. 🙂
Yay!