Lorac Pro Palette Look #1


About this Look
Before every makeup look I do I like to set out the products I have an idea that I will be using.
So, In this look I use:
E.l.f. Eye shadow Primer
Baby Lips in Pink Wink
Revlon Photoready Concealer in 001 Fair
Ulta Double Duty Pressed Powder Foundation in Fair
NYX Incredible Waterproof Concealer in CS01 Porcelain
Lorac Pro Palette Shadow in Nude
Lorac Pro Palette Shadow in Espresso
Lorac Pro Palette Shadow in Pewter
Urban Decay Shadow in Half Baked
bareMinerals Flawless Definition Mascara in Black
NYC Smooth Skin Bronzing Face Powder in 720A Sunny
Clinique Soft-Pressed Powder Blusher in 04 Pink Blush
Clinique Soft-Pressed Powder Blusher in 20 Mocha Pink
——–
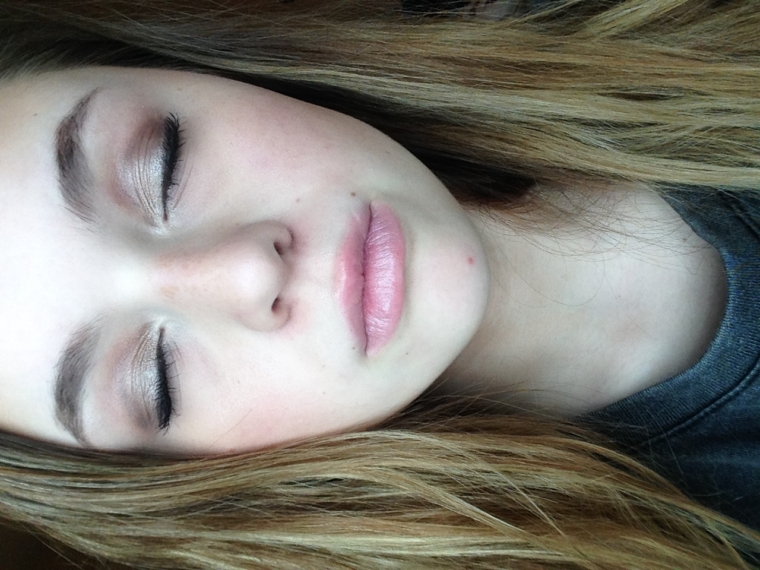
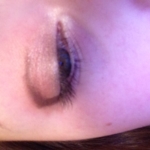
Okay, now to the fun part! After I cleansed my skin, moisturized, and primed using the Maybelline Baby Skin Instant Pore Eraser, I apply my E.l.f Eye shadow Primer all over my eyelid to my brow bone and also to my lower lash line since I applied shadows there as well. Then, I took Half Baked from my original Naked Palette from Urban Decay and applied it just to my lid to give the next shadow a golden undertone to blend into. Next, I took Nooner from my Naked 3 palette and dusted it through my crease as a transition shade. After I applied Half Baked and Nooner I finally got to my Lorac Shades which is the main focus of this whole look! I took Pewter from the Lorac Pro Palette and applied it all over my lid over Half Baked and softened the edges using Nooner again (but barely grabbing any Nooner because I didn’t want a super mocha-pinky toned look). Next, I took Espresso from my Lorac Pro Palette and put it in a sort of a curved type triangle shaped carving out the crease and working it into the outer-corner of my lid. I placed my Espresso shadow where I wanted it before I blended the shadow. The Lorac shadows are some of my favorite and thy’re so creamy and easy to blend yet so pigmented at the same time so blending the shadows was very easy! I didn’t go super dark with Espresso but you can definitely build up the shadow if you want. After blending I put Nude from the Lorac Pro Palette and put it VERY sparingly on my brow-bone because it is a VERY intense highlight shade, but its one of my favorites! I also put Nude in my inner corner and just barely brought it up into Pewter and popped it into the middle of my lid to make my eyes pop even more! After that, I took some of my RevitaLens Multi-Purpose Disinfecting Solution (basically their just eye-drops) and put some of the drops onto the brush I was using (it was just a very small liner brush) and took Espresso and lined my upper lash line and winged it out ever so slightly. (using the eye drops will basically turn the shadow into a eyeliner, it will make it pop more when its wet and stand out more than the Espresso already in your crease!) After using the Espresso as a liner, I took a tiny bit of non-wet Espresso to the very edge of my lash-line and popped Pewter right beside it. Right beside Pewter I took Nooner and placed it right beside it. And then right beside Nooner I added a bit more of the Nude shade from the Lorac Pro Palette and blended the shadows very lightly but where you could still distinguish between them. Then, I applied my bareMinerals Flawless Definition Mascara generously to my top and bottom lashes and skipped falsies but you can add them and it would look just as well if not better!
For face makeup I always keep it very simple and I just applied my Revlon Photoready Concealer to my under eyes (which doesn’t work great at all & I’m in need of a new favorite concealer!) and then I set the concealer with my Ulta Double Duty Pressed Powder Foundation. I applied my NYC Sunny Bronzer (which is my drugstore fav!) to my forehead, jawline, cheekbones, chin, and my nose to contour a bit. I also popped that bronzer right under my lip which is a nice little trick to make your lips look bigger and poutier! (I think that’s a word) I also applied Cliniques Blusher in 20 Mocha Pink to the back of my cheekbones and their blusher in 04 Pink Blush to the apples of my cheeks. I used the shadow Nude from the Lorac Pro Palette as a highlight with a an brush to lightly highlight my cheek bones, my nose, and my cupids bow. To finish the look off with heaps of the Maybelline’s Baby Lips in Pink Wink to give the most beautiful light-pinky hydrated lip look!
THANK YOU for reading!! I hope you enjoyed this look and reading about it! I really love this look and I tend to wear this as a everyday look a lot. Again, I hope you enjoyed & thank you (: !!!!!!!
sorry some of the pictures are upside down/side ways but I don’t know how to fix it lol