Tutorial - Teal-Blue
This tutorial is for a darker teal/blue look – it’s a very bold, vibrant look, so if you prefer soft looks, this isn’t it. 😉
Skill Level: Beginner-Moderate

You will need the following products: water-based mixing medium, a medium-bright green base (Kelly Green pigment), a pastel mint green eyeshadow (Aquavert eyeshadow), a teal eyeshadow (Melody), a darker teal eyeshadow (Tease ‘n Teal), a deep blue/purple eyeshadow (Cinders eyeshadow), a medium-dark blue eyeshadow (Freshwater eyeshadow), a highlight color (Blurr eyeshadow), black liner of choice, and black mascara of choice. To finish the look, I used Springsheen blush with Enriched Refined Bronze to contour cheeks, and on my lips, I used Velvet Teddy lipstick with Pink Lemonade lipglass.
You will need the following tools: a good blending brush (Philosophy Shadow brush) and a flat, short bristled brush to apply wet pigment.

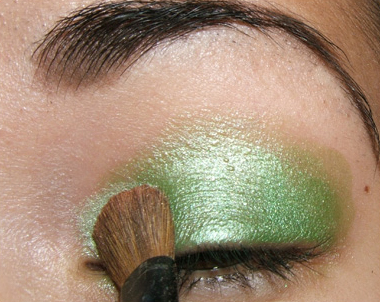
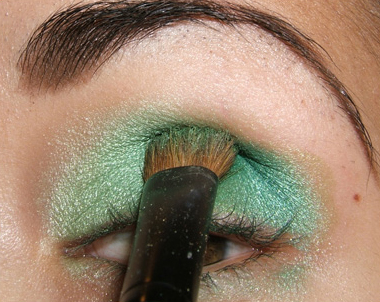
Using a semi-firm, flat bristled brush, put just a touch of water-based mixing medium on it, swipe it against the back of your hand to ensure it isn’t too wet, and then pick up some Kelly Green pigment. Place all over lid area, making sure to only cover enough area so that your lid and just over the crease line is covered.

Like so.
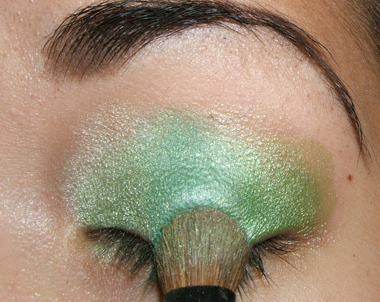
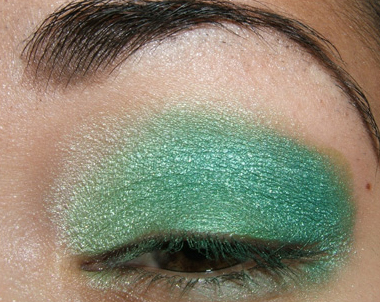
Using you blending brush, pick up Aquavert eyeshadow and place on the inner one-third to one-half of your eyelid.

This is what you should have.

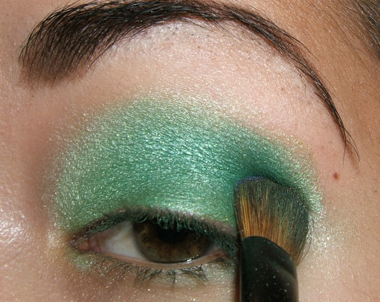
Again, using your blending brush, pick up Melody (or Tease ‘n Teal if you can’t find a good flat teal shadow!) eyeshadow and apply it to the middle of your eyelid, starting from around the crease area and pulling the color downwards to the upper lash line.
Remember, pull downwards.
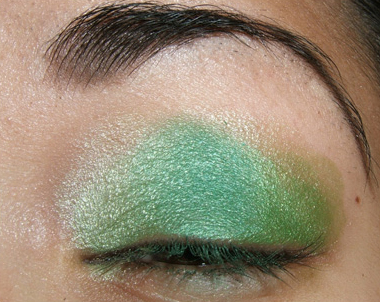
Like so.
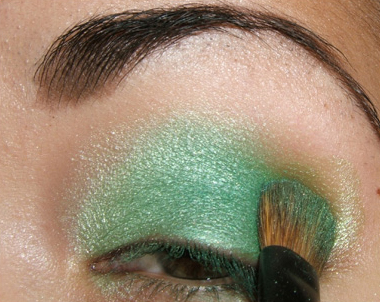
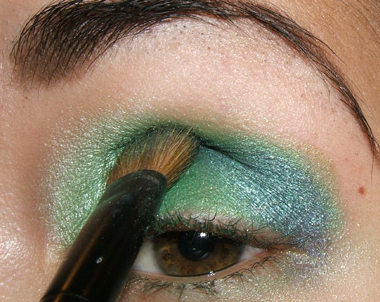
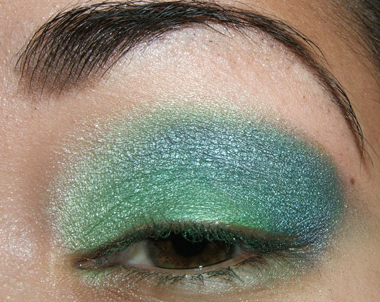
Using you blending brush, pick up Tease ‘n Teal eyeshadow and place the color on the outer one-third of your brush beginning at the crease line and moving downwards toward the upper lower lash line.

This is what you should get.
Picking up more of our teal color, place your blending brush horizontally against your crease to pull the coral color into the crease area.
Like so.
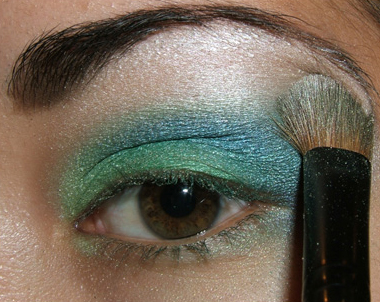
Using your blending brush, pick up Cinders eyeshadow and place on the very outer edge of your lid.
Then moving the brush horizontally, pull the newly placed Cinders eyeshadow into your crease.
You should have something that looks like this.

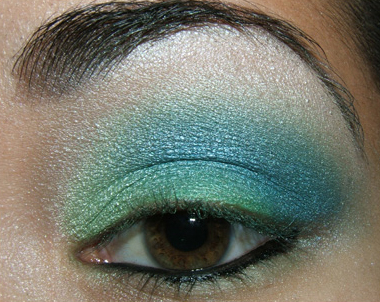
Again, using your blending brush, pick up some Freshwater eyeshadow and apply it just like we have in the past when we’ve done crease-work, but only apply it to the lower portion of your crease.

This is what it should look like.

Using the blending brush, pick up your browbone highlight color of choice and place directly underneath the arch and move your brush in the same direction of your brow.
You should pull the color with your brush outwards and then lift up and begin apply it to the inner portion of the brow area.
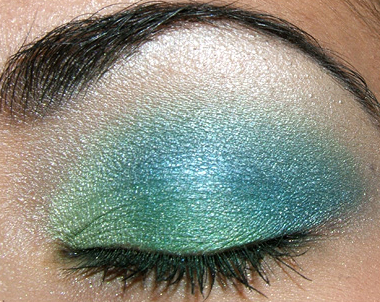
Add your choice of black liner (or colored liner) and favorite mascara to finish the look.
The final product:


AWWWWWWW 😀 WONDEFUL AS ALWAYS !!!I just wished you took apic of ur face ..from what i can see hun your gorgeous 🙂
thanx for sharing
No problem 🙂 If you join makeupdiversity.org or specktra.net, you can see full face posts there!
Wow! Thank you for having this up here because I’m still trying to figure out the entire blending thing. Beautiful colors!
No problem, Ginger! I hope it helps you a little bit 🙂
Not to sound dumb, but I’ve always wondered what a “water-based mixing medium” was. What is it, and where can I buy some? Also, beautiful work as always. I’m a fan, I just have to gather up the courage to be spontaneous w/ my makeup!
MAC makes it, but I use a homemade version that’s one part glycerin to three parts water. You can find glycerin in your local drug store 🙂
Thank you!
I can’t seem to find Melody or Tease n Teal anywhere. wait. add cinders and blurr as well. were they limited editions? or were they nyx?
Melody was discontinued awhile back, and Tease ‘n Teal, Cinders, and Blurr were in a limited holiday palette. Tease ‘n Teal is similar to Aquadisiac/Steamy, Cinders is similar to Contrast, and Blurr is similar to Nylon.
Hey Christine:)
I like the look alot. I wish if you’d do a pink & black smokey eye sometime, pweeaase? Like pinkish all ove the lid & black in the outer corner, I can’t figure out how to do that. 🙁
Hi Dana! I think I have in the past, but I will try and keep it in mind when I’m doing my makeup 🙂
I love your tutorials but have trouble finding the colours… Is it mostly all MAC eyeshadow/Pigment etc? Or do you use others?
Love this look by the way (and I peeked at your collection and was amazed)
Hi Jessie!
Unless it’s stated otherwise, everything I use is by MAC 🙂
Thank you!
I this look, but would you recommend it for day or just an evening out?
Hi there, Xochitl! I’d wear this look for either day or evening 🙂 I wouldn’t wear it to a job interview or anything, but it’s not that bold and it’s fun.
nice!
i was wondering,do you have any ‘peacock’looks???
what i mean is look that contains golden,purple,teal(well more of a color like aquadisiac)blue,all that on the lid,nicely blended together..so i can see the pic?
Andrea,
These are the looks that would come closest…
http://www.temptalia.com/mac-cosmetics-multi-color-001
http://www.temptalia.com/mac-cosmetics-multi-color-011
http://www.temptalia.com/mac-cosmetics-multi-color-009
http://www.temptalia.com/tutorial-multi-colored-tropical
http://www.temptalia.com/mac-cosmetics-multi-color-018
You inspire me! hehe The tutorials are sooo helpful…i think it would be sooo great if you had more though!..you’re really talented 🙂
Thanks, ValerieAnne 😀 I will try to put more tutorials if I have time to do them!
As always,beautiful!Your tutorials are soooo good,so easy(step by step to practice),so wanting to practice 🙂
However I do have one question.Is it possible ( well,I know that probably it is,because why not!?)to achieve close effect without using Kelly Green pigment – I do not one one.I do not owe also anything close 🙁 I trully love the TEAL effect 🙂
Thanks,
Madeleine
Thanks Madeleine!
Do you have any sort of green that’s not dark? That might work. Or else you could try using a gold color and layering blue and teal over it 🙂
These are my greens and blues,you pick,please which one is the most suitable.If any….I hope 😉
Swan Lake,Bang on Blue,Fade,Deep Truth,Flashtrack,Tilt,Electric Eel,Shimmermoss,Steamy ,Brill,Juxt,and Fiction.
Last week I’ve also purchased Copperized pigment and e/s Ether.
Shimmermoss alone should give you the teal look you want 🙂 Add a touch of Juxt, too. Copperized might substitute if you put Juxt on top of it and added a bit of Shimmermoss or Steamy.